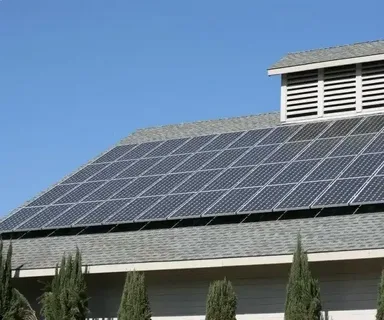
As energy costs continue to rise and environmental concerns become more pressing, more homeowners are turning to solar energy as a smart and sustainable alternative. The Complete Guide to Installing a home solar power system will help you understand every step of the process—from initial planning to final installation—so you can make an informed decision and enjoy the benefits of clean, renewable energy.
Why Go Solar?
Before diving into the technical aspects, it’s important to understand the benefits of solar power:
- Lower electricity bills: Once installed, solar panels can significantly reduce or even eliminate your energy costs.
- Environmental impact: Solar power reduces your carbon footprint and reliance on fossil fuels.
- Increase in home value: Homes with solar power systems tend to sell faster and at higher prices.
- Government incentives: Federal and state programs often provide tax credits and rebates to offset installation costs.
Step 1: Evaluate Your Home’s Solar Potential
The first step in The Complete Guide to Installing a Home Solar Power System is assessing whether your home is suitable for solar power. Key considerations include:
- Roof orientation and angle: South-facing roofs with a 15–40° pitch are ideal.
- Shade: Ensure minimal shading from trees, buildings, or chimneys.
- Roof condition: It’s best to install solar panels on newer or recently repaired roofs.
Step 2: Choose the Right Solar System Type
There are three main types of solar power systems:
1. Grid-Tied Systems
These are connected to the public electricity grid and do not include battery storage. They’re the most common and cost-effective option.
2. Off-Grid Systems
These operate independently from the grid and require battery storage. Ideal for remote locations, but generally more expensive.
3. Hybrid Systems
Combining grid connection and battery backup, hybrid systems offer greater reliability and flexibility.
Choosing the right system depends on your budget, energy needs, and location.
Step 3: Estimate Costs and Savings
While the upfront cost of solar installation can be significant (typically $10,000–$30,000), long-term savings make it a worthwhile investment. Use online solar calculators or consult local providers to estimate:
- Installation and equipment costs
- Potential tax credits and incentives
- Estimated annual savings on electricity
Step 4: Hire a Professional Installer
In The Complete Guide to Installing a Home Solar Power System, one of the most crucial steps is hiring the right installer. Look for:
- Licensed and certified professionals (e.g., NABCEP-certified)
- Experience with similar systems
- Good customer reviews and warranties
Always request multiple quotes to compare pricing and services.
Step 5: Installation and Inspection
Once you’ve chosen an installer, the process usually follows these steps:
- Site assessment and final system design
- Permitting and paperwork with your local municipality
- Installation of panels, inverters, and wiring
- Inspection and connection to the grid (if applicable)
The entire process typically takes 1–3 months from start to finish.
Maintenance and Monitoring
Solar power systems require minimal maintenance. However, regular cleaning and occasional inspections ensure peak performance. Many systems also offer online monitoring so you can track energy production and system health.
Conclusion
By following The Complete Guide to Installing a Home Solar Power System, homeowners can transition smoothly to solar energy. With careful planning, professional installation, and ongoing monitoring, you can enjoy clean energy, long-term savings, and a reduced carbon footprint. Whether you’re aiming for full energy independence or just looking to cut your utility bills, solar power is a smart investment for the future.


